Preparing Your HVAC System for Summer: A 2025 Spring Guide
Spring preparation for your HVAC system sets the foundation for reliable cooling and energy savings during the warmer months. Professional tune-ups typically cost between $75 and $200, varying by system type, location, and existing condition. Early identification of issues through maintenance enhances performance, extends equipment life, and minimizes disruptions.
This guide presents eight essential steps to ready your HVAC for summer 2025. Applicable to central air conditioners, heat pumps, or ductless units, these actions promote efficiency and reduce repair expenses as temperatures climb.
Step 1: Replace the Air Filter
A dirty air filter restricts airflow, forces the system to work harder, and increases energy use. Replace the filter in spring to maintain optimal performance and indoor air quality.
Replacement Process
- Locate the filter compartment, usually near the return air duct or furnace.
- Remove the old filter and note the airflow direction indicated by the arrow.
- Insert a new filter with the correct size and MERV rating for your system.
- Secure the compartment and run the fan briefly to verify smooth operation.
Select filters with a MERV rating of 8 to 13 for balanced filtration without excessive resistance. Fresh filters improve cooling efficiency and protect components from dust accumulation.
Step 2: Inspect and Clean the Outdoor Unit
The outdoor condenser unit faces exposure to weather, dirt, and debris such as leaves, grass clippings, and pollen. Accumulation on coils hinders heat exchange and diminishes cooling effectiveness.
Cleaning Steps
- Shut off power to the unit at the breaker.
- Clear debris from the surrounding area, maintaining at least two feet of clearance.
- Gently brush or vacuum dirt from the fins.
- Rinse coils with a garden hose if needed, using low pressure.
Steer clear of high-pressure water or harsh chemicals to avoid damaging delicate fins. A cleared condenser supports efficient heat dissipation and prevents overheating under summer loads.
Step 3: Clean the Indoor Evaporator Coils
Evaporator coils inside the unit collect dust and grime over time, reducing heat absorption and causing the system to cycle longer. Cleaning these coils in spring restores cooling capacity.
Cleaning Approach
- Access the indoor coil, often behind the air handler or furnace.
- Turn off power and remove access panels.
- Apply a no-rinse coil cleaner spray to loosen debris.
- Allow the cleaner to evaporate, then reassemble.
For heavy buildup, consider professional assistance to avoid damaging coils. Clean coils enhance efficiency, lower operating costs, and maintain consistent temperatures.
Step 4: Inspect Ductwork and Vents
Leaky or blocked ducts result in lost conditioned air, uneven temperatures, and elevated energy consumption. A spring review of ducts and vents addresses these inefficiencies.
Inspection Points
- Examine visible duct joints for gaps or loose seals.
- Wipe dust from registers and grilles.
- Check for whistling noises signaling air escapes.
Schedule professional cleaning or sealing if mold, extensive dirt, or structural issues appear. Optimized ducts deliver balanced cooling and superior air quality.
Step 5: Check and Calibrate the Thermostat
An inaccurate thermostat leads to improper cycling, discomfort, and wasted energy. Verify and adjust settings in spring to align with your cooling needs.
Calibration Steps
- Compare the thermostat reading to a separate thermometer.
- Adjust batteries if the display fades or errors occur.
- For programmable models, set schedules for energy savings.
- Test responsiveness by changing settings and observing system reaction.
Upgrade to a smart thermostat if your current model lacks precision. Accurate controls optimize runtime, reduce bills, and enhance user convenience.
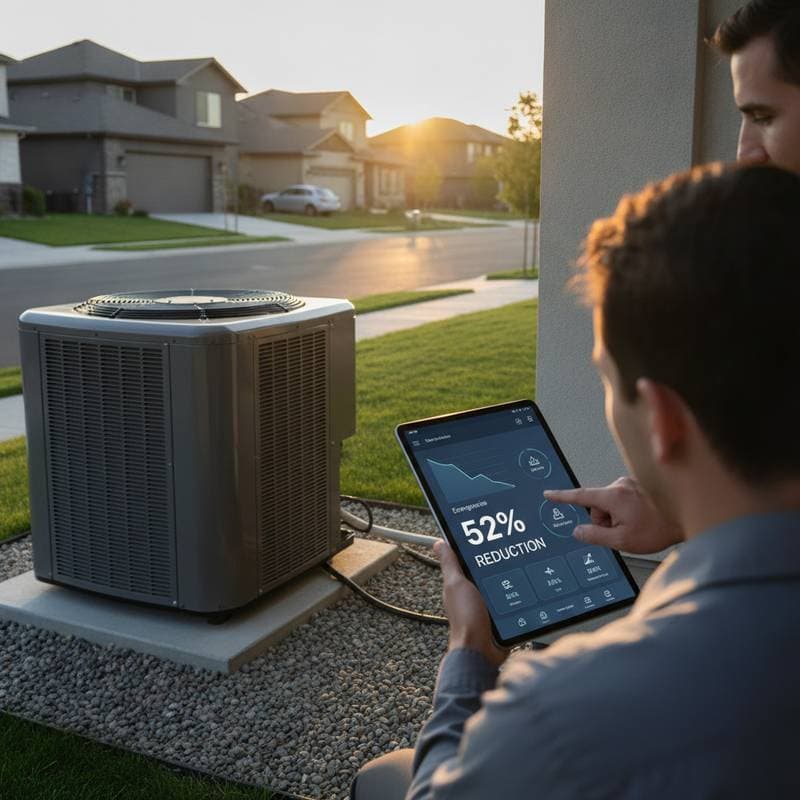
Step 6: Test System Performance
After cleaning and assembly, conduct a test run to confirm proper startup and operation. This evaluation uncovers problems like noise, airflow issues, or cooling deficiencies before peak demand.
Observation Checklist
- Startup: Ensure smooth initiation without hesitation.
- Airflow: Verify even cool air distribution from vents.
- Noise Levels: Detect any rattling or grinding indicating loose parts.
- Temperature Drop: Gauge supply vent air to validate cooling effectiveness.
Address subpar results with a technician visit. Early detection averts major failures during intense heat.
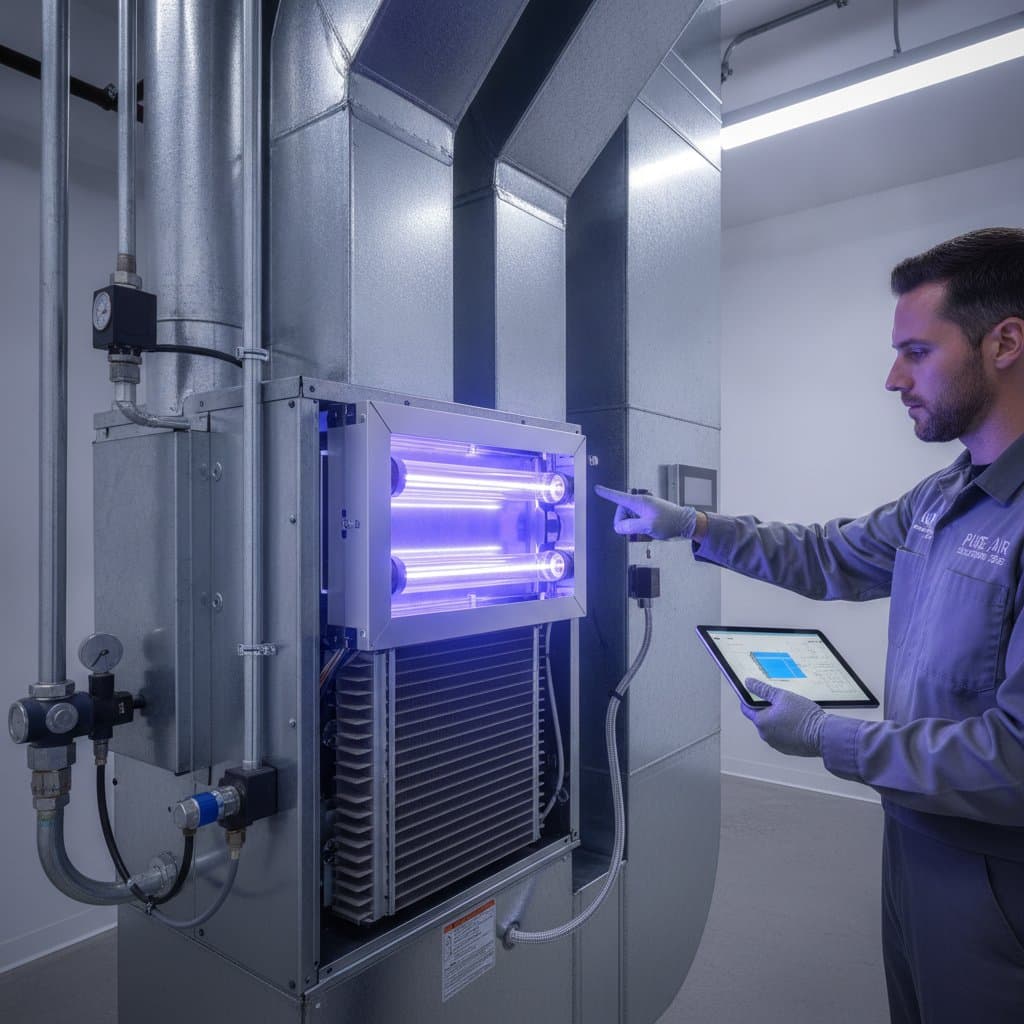
Step 7: Schedule a Professional HVAC Tune-Up
Expert servicing provides comprehensive checks beyond basic tasks, ensuring peak operation. Technicians address details that safeguard reliability.
Standard Tune-Up Components
| Task | Description |
|---|---|
| Refrigerant level check | Verifies adequate cooling power |
| Electrical inspection | Identifies potential shorts or hazards |
| Lubrication of parts | Minimizes wear on moving elements |
| Thermostat calibration | Enhances precision and savings |
| Blower examination | Sustains strong airflow |
| Control testing | Ensures safe functionality |
Tune-up fees range from $75 to $200 based on system scale and regional rates. This investment yields returns via reduced energy use and avoided emergency calls.
Step 8: Clear the Condensate Drain Line
Cooling generates moisture that exits via a drain line prone to algae and debris clogs. Blockages risk water damage and excess indoor humidity.
Maintenance Method
- Find the drain line exiting the indoor unit.
- Attach a wet/dry vacuum to suck out obstructions.
- Flush with a vinegar-water solution to inhibit regrowth.
Periodic attention to the drain preserves humidity balance and prevents leaks during operation.
Typical HVAC Maintenance Expenses
Budgeting for spring tasks requires awareness of standard costs, which prove more economical than summer emergencies.
| Service | Cost Range | Notes |
|---|---|---|
| Filter swap | $10–$40 | Based on size and rating |
| Coil cleaning | $100–$300 | Covers indoor and outdoor |
| Duct review | $75–$150 | Spots leaks and obstructions |
| Thermostat update | $120–$300 | For advanced models |
| Complete tune-up | $75–$200 | Full seasonal service |
Regional factors and equipment specifics influence prices, yet proactive care limits overall spending.
Frequently Asked Questions on Spring HVAC Care
How frequently does HVAC maintenance occur?
Manufacturers advise annual professional service. Spring suits cooling preparation, fall heating focus. Consistent care upholds warranties and performance.
What duration marks a spring tune-up?
Sessions span one to two hours, contingent on system design and access. Technicians clean, inspect, test, and adjust for seasonal readiness.
Which indicators signal pre-summer repairs?
Monitor reduced airflow, temperature inconsistencies, odd sounds, or bill spikes. Leaks or odors suggest prompt action to avert escalation.
Does spring maintenance prolong HVAC life?
Affirmative. Clean elements lessen motor and compressor stress. Maintained units endure 15 to 20 years; neglected ones falter earlier.
Is full DIY maintenance feasible?
Basic filter and cleaning tasks suit homeowners, but refrigerant, electrical, and internal checks demand professionals. Integrated efforts maximize benefits.
Securing Professional Service Estimates
Key Inquiries for Providers
- Confirm licensing and insurance status.
- Detail tune-up scope and potential fees.
- Inquire about maintenance plans or discounts.
- Ask tenure with similar systems.
- Note specialized brands or types.
- Request references or reviews.
- Verify refrigerant and electrical checks.
- Gauge scheduling availability.
- Expect written post-service reports.
Thorough vetting ensures quality service aligned with your needs.
Sustaining HVAC Efficiency Year-Round
Spring actions fortify your system against summer challenges, promoting longevity and cost control. Integrate these steps into routine care for sustained comfort and savings.