Avoid $800 HVAC Repairs with These Essential DIY Checks
Basic maintenance tasks require only a few minutes each month yet can prevent hundreds of dollars in repair expenses. Many expensive failures trace back to overlooked details, such as a clogged filter or debris around the outdoor unit. Perform these straightforward inspections to maintain efficiency, prolong equipment life, and eliminate the need for urgent service visits.
| Check | Time Required | Potential Savings |
|---|---|---|
| Replace or clean air filter | 5 minutes | Up to $200 annually on energy costs |
| Clear condensate drain line | 10 minutes | Avoid $300 in water damage repairs |
| Inspect outdoor unit | 10 minutes | Prevent $800 compressor failure |
| Test thermostat | 5 minutes | Minimize unnecessary operation |
| Clean vents and registers | 15 minutes | Enhance airflow and indoor comfort |
The Importance of Routine HVAC Maintenance
HVAC systems operate continuously to regulate temperature, manage humidity, and ensure fresh air circulation. Accumulation of dust, dirt, or obstructions hampers performance, compelling components to labor excessively. This added stress accelerates component degradation, elevates utility expenses, and frequently results in substantial repair bills. Simple preventive measures preserve optimal function and avert unexpected $800 service charges.
Essential DIY Checks for HVAC Reliability
These maintenance steps demand no specialized equipment or expertise. Dedicate time monthly to examine and service key areas, ensuring smooth operation throughout the year.
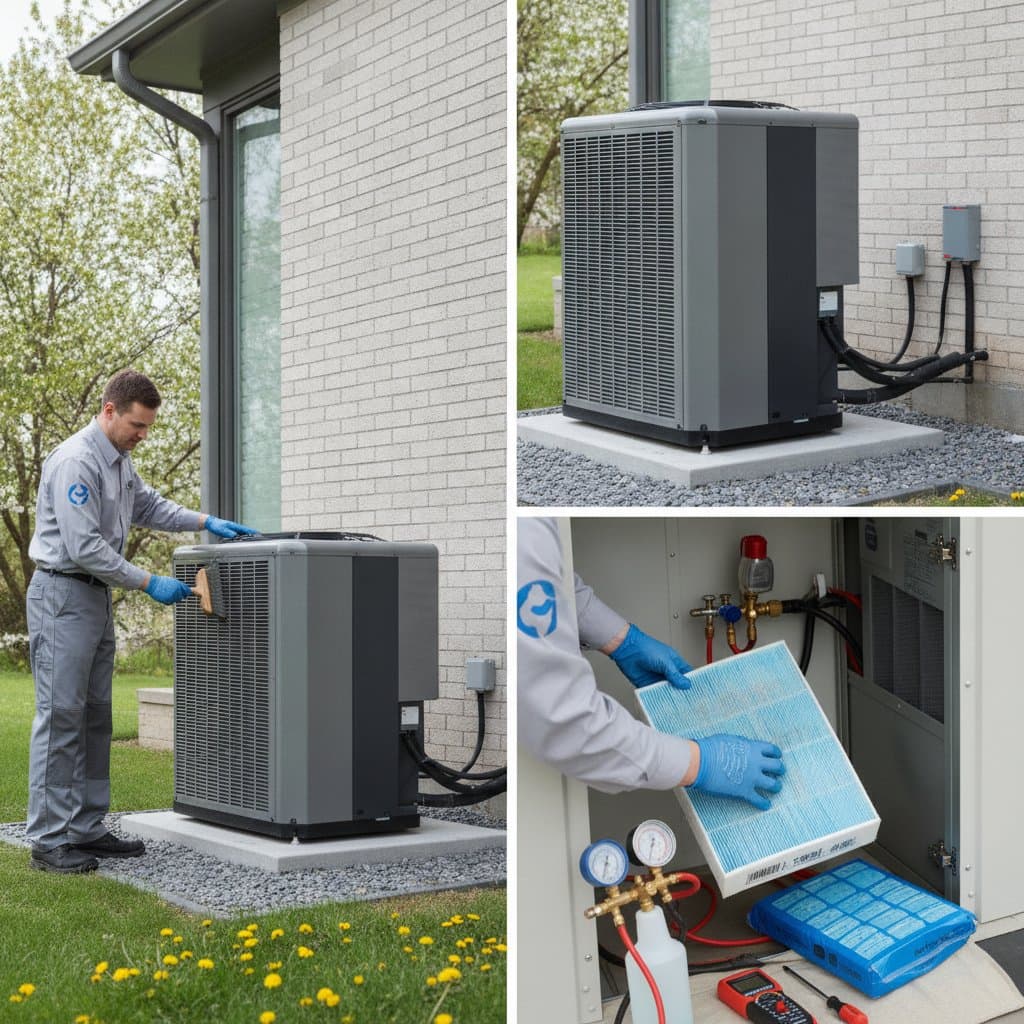
1. Replace or Clean the Air Filter
A clogged air filter represents the primary source of operational strain. Restricted airflow overworks the blower motor and risks coil icing.
Inspect the filter monthly; replace it every one to three months based on household dust, pet presence, or occupancy levels.
Look for reduced airflow from vents, inconsistent room temperatures, or rising energy statements as indicators of replacement needs.
2. Clear the Condensate Drain Line
The condensate line expels excess moisture generated during cooling cycles. Blockages cause water accumulation and potential interior flooding.
Flush the line with one cup of white vinegar every two to three months to dissolve mineral deposits and inhibit algal growth.
Monitor for standing water near the indoor unit or damp, mold-like odors emanating from air outlets.
3. Inspect the Outdoor Unit
Debris such as leaves, twigs, or soil impedes airflow to the condenser coils, causing overheating and compressor strain.
Disconnect power at the breaker, clear surrounding vegetation, and rinse coils with a garden hose on low pressure. Maintain a two-foot clearance on all sides.
Examine for dented fins, unusual humming sounds, or warm exhaust air, which signal immediate attention requirements.
4. Test the Thermostat
Malfunctioning thermostats lead to erratic cycling or inadequate temperature control.
Adjust the setting by two to three degrees and observe system activation. If unresponsive, install fresh batteries or consult the user manual for calibration instructions.
Upgrade to a smart thermostat for automated adjustments that optimize energy consumption during unoccupied periods.
5. Clean Vents and Registers
Dust buildup and pet dander in supply and return vents diminish air distribution and promote allergen spread.
Use a vacuum with a brush attachment to remove debris from grilles; verify dampers remain fully open for maximum flow.
This practice not only improves circulation but also extends filter lifespan by reducing particle load.
Leading Causes of Expensive HVAC Failures
Knowledge of common failure triggers directs preventive focus effectively.
Dirty Coils
Dust layers on evaporator or condenser coils impair heat exchange, extending runtime and risking compressor overload.
Low Refrigerant Levels
Gradual leaks compromise cooling capacity and may cause coil freezing. Professional leak detection and refrigerant replenishment incur significant costs.
Electrical Issues
Vibrations loosen wiring or degrade contactors, resulting in intermittent operation or startup failures.
Lack of Regular Upkeep
Deferred servicing permits minor faults to escalate, transforming routine wear into comprehensive overhauls.
Recommended Schedule for DIY HVAC Tasks
Incorporate these activities into a consistent routine to sustain peak performance.
- Monthly: Examine and swap air filters as necessary.
- Quarterly: Vacuum vents, evaluate the outdoor unit, and flush the drain line.
- Annually: Arrange a certified technician for comprehensive diagnostics, including duct inspection and lubricant application.
Adherence to this schedule supports year-round dependability and cost control.
Signs That Demand Professional Intervention
While DIY efforts handle routine care, complex problems necessitate expert evaluation.
Seek technician assistance for persistent high runtime without adequate temperature change, mechanical sounds such as banging or whistling, frost formation on refrigerant lines, persistent leaks, or electrical odors during startup.
Trained professionals utilize specialized tools to assess refrigerant charge, verify voltage stability, and repair inaccessible elements without risk.
Frequently Asked Questions on DIY HVAC Care
How often should I replace my HVAC filter?
Replacement intervals vary from one to three months in most residences. Households with pets, high dust, or allergy sufferers benefit from monthly changes to sustain air quality.
Can I clean the evaporator coil myself?
Surface cleaning with a soft brush removes loose dirt, but thorough servicing requires professional handling to prevent fin damage or electrical hazards.
What happens if I ignore HVAC maintenance?
Systems gradually lose efficiency, consume more power, and face premature component failure. Consistent attention averts these outcomes and maximizes longevity.
Is it safe to hose off my outdoor unit?
Yes, provided power is disconnected first. Use moderate water pressure to avoid bending delicate fins; direct the spray parallel to the coil surface.
Why does my HVAC turn on and off frequently?
Short cycling often stems from oversized units, low refrigerant, dirty filters, or thermostat errors. A professional tune-up identifies and resolves the root cause.
How can I tell if my condensate line is clogged?
Evidence includes water stains under the indoor unit, gurgling sounds from the drain, or overflow during humid conditions. Prompt vinegar flushing typically restores flow.
Implement These Steps to Safeguard Your System
Incorporate monthly inspections into your routine to detect issues early, enhance home comfort, and trim operational expenses. These brief efforts yield substantial returns by averting escalations from minor oversights. For any concerning symptoms, contact a qualified service provider promptly to maintain uninterrupted performance.